Saturday, 14 April 2018

Postcards from Sweden: crochet version

I am so excited to show you my latest creation!


YAAAAAAAY!!!  When I saw the Postcards from Sweden quilt pattern from Jeliquilts here, it was love at first sight.  However, I couldn't afford to quilt it, because this would tie me in to making 2 quilts plus a crochet blanket.  You see, one boy has a crochet blanket so the other was clearly owed one.  I didn't dare add quilting debts to this.  So I had to make the Postcards from Sweden as a crochet blanket for the smallest boy.


Because I cannot step away from the day job, I matched the yarn colours to the original Kona fabrics by writing a python script.  What else would you do?!

The very lovely Kelly has kindly agreed that I can share my colour list with you so you can recreate her work in yarn too!  You'll need to head on over here to download her free pattern, but really you only need to print pages 6 and 7 which describe her layout.  From there, you can write in the yarn colours in to her handy chart and then it's a crochet-by-numbers exercise, and a very lovely one it is too.

Here's the yarn colours I used, numbered to match the original quilt scheme:

  1. Tomato
  2. Matador
  3. Lulk *
  4. Pomegranate
  5. Sage
  6. Green
  7. Pistachio
  8. Leuven *
  9. Citron
  10. Apricot
  11. Saffron
  12. Spice
  13. Pistachio
  14. Kelly Green
  15. Aspen
  16. Cloud Blue
  17. Denim
  18. Turquoise
  19. Empire
  20. Lapis
  21. Sherbet
  22. Wisteria
  23. Magenta
  24. Amstelveen *
  25. Amstelveen *
  26. Lavender
  27. Lipstick
  28. Amersfoort *
  29. Lulk *
  30. Clematis
  31. Fondant
  32. Fondant
  33. Knokke *
  34. Spice
  35. Sunshine
  36. Spring Green

All colours are Stylecraft Special DK, except those marked with an asterisk which are Scheepjes Colour Crafter.  That's 31 distinct colours, I used less than 100g of each colour.

The border is made up of three additional Stylecraft colours:

  1. Grey
  2. Graphite
  3. Cream


In terms of the blocks, they're a solid granny square of UK treble crochet worked in two colours at once, which is achieved by reversing the work direction.  I bring you a diagram:


I worked 6 rounds for each block.  The only non-standard bit is where you reverse direction - after 2 ch, slst into the start of the round, then turn the work and slst back over the ch and then get ready to ch 3 to act as your first tr and you're away again.

Don't worry if the diagram is opaque - I made some video tutorials, so hopefully the diagram will be a good reminder once you have watched them.

There are three parts to the videos:

  1. Round 1
  2. Round 2
  3. Round 3

For the border, I used 5 rounds of linen stitch from the Attic24 blog here.  The colour order is Grey, Cream, Graphite, Cream, Grey.  Again, I was just trying to mimic my favourite quilt binding I've seen on the postcards quilt!

I found it important to keep track of all the squares by storing them on stitch markers as I made them to keep them in order.  Scrap yarn through a square corner would do just as well.

It's like a rainbow slug on my floor.
My squares curled, as you can see in the image above.  It was necessary to block them to 5"x5".  The most painless way is a blocking board - slip them over the pegs and shoot steam at them from above with a hot steam iron - it's enough to relax the synthetic fibres. 

There's no need to fork out for a posh blocking board as long as you've got access to an electric drill and some MDF.  I've heard some people suggest 3mm DPNs as good blocking pegs, but you can save your pennies - 3mm stainless steel rod is widely used in remote control hobby aircraft, so grab yourself some cheap on eBay.  I bought mine too long and owe thanks to my Dad who chopped them up with his grinder.  Sorry Dad.  Then just drill yourself some holes and pop the pegs in.


The blocks are whip-stitched together (I didn't want a visible seam - I wanted to match the quilt look as close as I could).


My little boy now has his own blanket which will doubtless get trashed in den building (as it should be, of course).  If you have kids and are not sure if the blanket is needed - it always is.  Did I mention they look as good as new after a machine wash and tumble dry?!

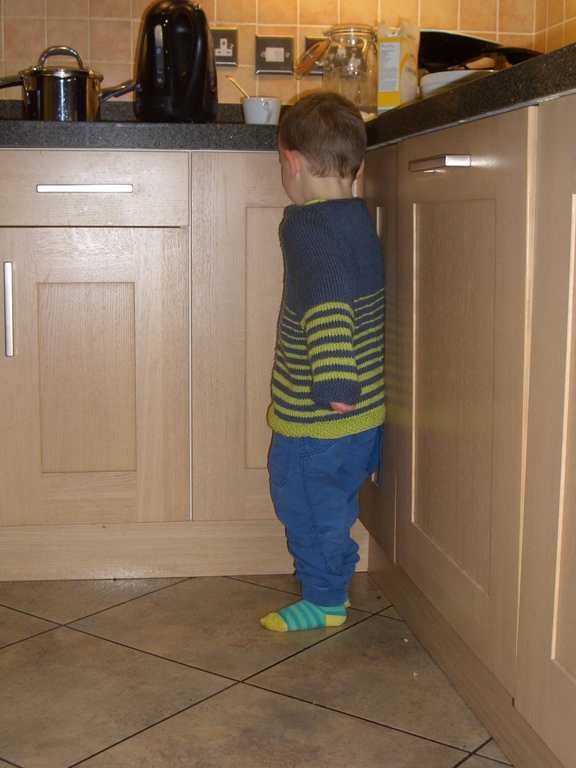
In my gauge the blocks are 5" square and the blanket comes out approximately double bed sided.  For scale, a real human on the blanket:


Once again, huge thanks to Jeliquilts for offering her quilt pattern to us all for free.  I can honestly say I enjoyed every single stitch I made to re-create her work in yarn.

You might be interested to know that I have started a crochet blanket for me now.  There's no pulling the wool over the kid's eyes (no matter how rainbow coloured) and they've spotted I already made myself a quilt, so have placed their own quilt orders accordingly.  I'd have got away with it if it weren't for those pesky kids...

Tuesday, 15 March 2016

Turning lace patterns upside down

This post isn't news to the knitting world, but since there seems to be quite a bit of confusion about it on forums when you google "knit lace pattern upside down" or somesuch, I thought it was worth a post.

Lets say (like me) you want to knit a seamless cardigan from the top down, but you want to include an all-over lace pattern.  Most lace charts are written bottom-up, at least in the stitch-dictionary on my shelf.  Maybe instead you are knitting a lace scarf and don't want to knit two shorter ones with a graft in the middle.  What to do?

Some A lot of posts on forums breezily suggest "just turn the chart upside down and replace decreases by increases!"  Don't listen to them, my friends.  While this may work for some lace patterns, it won't work for all.  And it may well look different from the lace knitted right-way-up, so I wouldn't try to match the two.

It is true you can expend a lot of brainpower and swatching time to devise an upside-down chart that retains most of the design features of the original pattern, but it might well not look the same in some key features.  There's a reason to graft your scarf in the middle!

Here comes an example:


This cute pattern of three holes is called "little flowers" in my stitch dictionary, or perhaps it's really little hearts.  Either way, it's cuter this way up than inverted ("little stack of bowling balls"?)  The chart is thusly:


Knitted bottom-up, you make the middle yarn-over (yo) on row 1, then the two yo on the next knit row 3.

Now turn the chart upside down.  You will make the two yo as your first pattern row - you can either make the decreases outside them, or switch to one centred double decrease in the middle.  By the issue comes when it's time to stack that last yo symmetrically on top of and between the lower pair.  There's a single stitch where we want our yo to go.  Where to put it?


The most obvious is to k2tog before the yo, or else yo then ssk.  Both these options lead to a "fat" bit between two of the holes, one side or the other, depending on which side you "got rid" of that central stitch to.  For clearer diagrams of this effect and how you can use it to make deliberate lace patterns, see here.

Here's my swatch:


Looking at the swatch above, the lowest motif is the original lace pattern worked from bottom up.  The next one up is the chart knitted upside down with a centred double decrease between the two yarn-overs.  Note that the pattern is no longer symmetrical - there's a fat bit between the bottom right hole and the central hole on top, due to the ssk before the last yo on row 3.

How do we get rid of the fat bit?  I tried two options.  The top motif in my swatch is the following chart:


I make one extra stitch on the purl row 2 by purling into the front and back of the central stitch, then I get rid of it again by doing symmetrical decreases around my top yo on row 3.  Symmetry is restored, but the pattern is less delicate - instead of a little yarn twist between the holes, there are fat bits on both sides where stitches have been knitted together leaning in both directions.

The second motif down is a bizarre non-standard variation on this theme, where the top hole is created by making the central stitch on the purl row very loose*, then on row 3 knitting into both sides and the top to pull it open.  I don't recommend it, and it looks much the same as my other symmetrical option which is easier to describe and execute.

* Insert needle into stitch to be knitted, yarn round needle twice, pull through stitch.  Like making a yo part way through the stitch.

The essential difference is that stitches are shifted by 1/2 stitch knitting top-down relative to bottom-up.  Think about the shift in the peaks vs troughs in a wave, or the number of fingers on your hand vs. gaps between them.  So, there's no easy way I can think of to exactly replicate the effect of knitting bottom-up while knitting top down.

In summary, I will be knitting my lace cardigan bottom-up with the original chart.

Friday, 11 March 2016

Socksssss


Going back in time a little bit here, because I never posted the BEST SOCKS EVAR (capslock totally necessary).  Knitted toe-up, two at a time with Trailing Clouds Nimbus Self Striping Sock, in colourway "Mind the Gap".  Ravelry project page here.


There is nothing better than socks in the colour of the London Tube lines.  This yarn is the BEST.

Tuesday, 8 March 2016

Advent Calendars in March


Patting myself on the back for this one - I finished the second Advent Calendar (see here for the first one), even though I totally didn't want to.  But I wouldn't want to do it any the more for leaving it until November so YAY me - made room in the diary for more Christmas Crafting later in 2016!

Monday, 29 February 2016

Inside Nellie

Disclaimer:

I don't know how much terminology is common between knitting machines, and I don't know how much terminology is familiar to machine knitters.  However, I hope this post might be useful to you if you are sitting with a Toyota Elena Auto 7 (Toyota K747) knitting machine and you're thinking of taking it apart.  Sorry if the terminology is odd or unfamiliar, I only know what words are in the service manual.  I have never machine knitted in my life yet (I had to fix my machine before I could begin), so sorry if I am aiming the technical talk too high or low.

Getting to the mechanisms


Main body of machine lifted out of casing

The first thing we did was take the sponge bar out, ready to later strip and replace the sponge with two layers of 9mm draft excluder (thanks ebay) and a layer of fusible interfacing (better sponge/interfacing combo yet to be purchased).

Then we removed the screws in the blue casing (as indicated in service manual) and eased the main machine out of the casing.  You can see this stage in the above picture - the casing is sitting behind the bottle of Meths and has become a dumping ground for space screws and notes.  The refurbished sponge bar is sitting in front of the machine.

The next stage was to remove the rest of the blue/cream plastic casing from the top of the machine.  The service manual gives screw locations for this, some of which are hidden underneath the knobs if I remember correctly.

Needle selection mechanism

The needle selection mechanism is revealed.  The blue "S" levers can be actuated by hand or by punch-card, and the red "J" lever can be used to choose between these options or reset the S levers.  More of this later.  There are some white cogs visible around where the knobs were - the leftmost winds the punch-card in, and the right "zig-zag" knob sets the position of the 12-stitch pattern relative to the central needle.  Rotating this moves the entire top mechanism (pattern board?) along relative to the needle bed.

It turns out there is a little bell underneath the zig-zag knob that rings when you've moved the needle selector (by applying wrench under front left of machine).  Obviously this charming "feature" wasn't working for us until after the overhaul because the whole machine was seized.  It's not working any more either, because I shoved some sponge inside the bell so that I can stealth-knit when the children are asleep.

Underneath the machine


Flipping the machine over, you need to be careful not to damage the needles, so best have them hanging over the edge of the table, or removed (as we did).


On the bottom, you can see a variety of plates which I'm going to do my best to describe.  The biggest pair of plates are named "J installing boards" or somesuch (the manual refers to them by more than one name), while the next biggest pair are the "S installing boards".  I think the names may derive from the shape of the linkages attached to them, if that helps you to remember while reading the manual.

Anyways, all the plates are bolted to the underside of the needle bed joint plate at the front of the machine, and have linkages with cams that work into slots on the "working board" - a metal bar that runs the length of the needle bed and moves back/forth and side to side as the needle selector is actuated.  The working board has a big spring that attaches it to one side of the machine (bottom right corner of picture below).

The J installing boards have their back end bolted to one of the two long metal plates that support all the pattern selector levers and gubbins ("J feed plate" and "J pedestal plate").  The S installing boards have their back end bolted to the "S rest plate", which on the other side has a bunch of black notched plates, named "S pattern plates" or "S boards" or something (the names get a bit confusing).  There are a bunch of other smaller plates to set working distances and keep it all square.

How it works


Here is (approximately) how it works.  The needles are selected by your fingers on the blue S-levers, or by the punchcard which also flicks those blue levers.  The levers have little legs underneath which sit astride some rods (the "S rods" or something).  The clever stuff happens when you actuate the big "needle selection mechanism" lever with a wrench on the bottom left of the machine.  When selected, the lever engages with the rod below it and flicks it to the side, which flicks up the corresponding S board (with the notches on top).  The S boards are then moved toward the needles, and the ones that have been selected (moved up in their mount by the rod) push on the needles, moving them to the appropriate position.  Ta-dah!

The S/J lever mechanism has been removed here, and you can see the S-rods poking through the S boards.
There are 23 S-rods, to account for the full range of pattern positioning (only 12 of these are aligned with the 12 S-levers at any time, dependent on the zig-zag dial setting.  There are a bunch of tiny springs on half of them.

S pattern plates / S boards or whatever they're called
Here follows a little sequence of images as the needle selection lever is progressively moved.

1.  Not yet moved

2.  J feed plate moves forward (left hand side) and engages S levers with S rods, selecting the S boards

3.  S rest plate and all S boards move forward and select needles

Cleaning


We took apart every single thing except the black stack of S-boards and the armature pivots that had been riveted.  Everything was cleaned with auto degreaser and re-lubricated with lithium grease.  There are a LOT of contact surfaces, so thoroughness is key because little bits of friction can add up.  If you look carefully at the photos you can see my scribblings where I used permanent marker to label the pieces with their names and mark positions.  I also scribed important location marks into the metal with a knife as auto degreaser removes the pen and basically everything including all the moisture in my palms.  (Dammit.)

If you use blu-tak to secure each screw you remove near the hole it came out of, then you can even get the whole thing back together again without losing a screw.  Except the one that gets blu-taked to your sleeve accidentally, but don't worry, that one gets found safely on your arm when you go the computer to look for a replacement on eBay, so you never have to press "buy" ;-)


As you can imagine, most of the yarn-related fluff is under the needle bed.  You can get all the needle springs out to clean in here.  There are a reasonable number of screws, but it's not that tricky once you're in there.  Also, the needle bed joint plate has a bunch of fluff inside, and you have to carefully peel off the needle numbers from the other side to get to the bolt-heads so you can steady them while you undo the nuts on the underside.  You'll need double-sided tape when you reassemble this bit (the sinker comb is 100 individual 2-prong pieces), plus some spray-adhesive for putting the numbers back on again (for heavens sake, spray the adhesive on the number strip underside NOT onto the machine needle bed!!!)

The trickiest parts were:
1.  Guiding the S rods back through the S boards (start at one end, with the rods angled slightly, and align each one in turn as you bring the parts parallel again).  It's a two-man job, unless you build yourself a jig like the one they have in the manual.
2.  Getting the little springs back on underneath the S lever mechanism.  I used button-thread to pull them through and ease them on.

If you are reading this because you have your Toyota K747 in bits all over your table: good luck!  I wonder if this post will prove to be as dull as I anticipate, or unexpectedly popular?  After all, my most visited page on my last blog concerns repairing washing machine tachometers, and it's proved a hard post to beat in terms of viewing numbers :-S

Saturday, 9 January 2016

I promised photos of the insides

Knitting Nellie is now in bits; there must be over 1000 and we've not even tackled the carriage(s) yet.  Behold: the main body of the machine is in pieces.


Mr B has cleaned all 200 needles (because he's a legend) and together we've probably made it through half of the machine insides so far.  Just the J-linkage system to go (the bit with all the needle selector levers and punch card feeder).  Some of the linkages we've cleaned so far have been completely seized solid - no wonder the needle selection lever wouldn't move!  The old lubricants have gone solid with age and dirt and need to be cleaned away and replaced with new grease.

In this photo you can see that the sinker comb is made from 100 double-prongs stuck to the brown double-sided tape.  Also, check out that fluff accumulation!  No regrets about taking this to bits so far.  Actually, it's pretty enjoyable.  This machine is an incredible creation.

Knitting machine with a beard.
My new double-sided carpet tape has arrived which means we can put the sinker comb back together and start putting bolting the bits back onto the needle bed!  I can't wait!

Sunday, 3 January 2016

Knitting Nellie!

Father Christmas brought me something special last year!  A few days before Christmas, I took the boys to collect a wonderful new toy from a very kind lady who was giving away her late mother's knitting machine.  I am very grateful indeed for her kindness, and I only hope I can live up to the previous owner's skills.  I have zero machine knitting experience to my name so far, but my aim is fair-isle Christmas jumpers for the boys by the end of 2016.  I've got 12 months.

This is knitting Nellie!


It's a Toyota K747 punch-card knitter with lace carriage, intarsia carriage, knit tracer and a bunch of manuals.  Also blank punchcards!  Very exciting!


It also comes with a marvellous range of 1980s pattern books, which I am very excited to dip into and make the boys wear!  Fair-isle dolly mixtures!  What more can I wish for?


Note the reindeer, centre bottom.  You're looking at my 2016 Christmas jumpers right there!

The knitting machine has sadly seized since its last use, so needs completely cleaning and re-oiling.  Fortunately both myself and my husband like to take things to bits, and this marvellous blogger has provided the full service manual online.  That shortens the take-to-bits time considerably by telling us the order to take the bolts out, and giving us a preview of the guts and how they work.  Mr B wants to call this a "re-build" to set expectations as to timescale (lengthy) and I suppose that's fair.

The sponge bar had degraded to such a sticky mess that the first job was to remove all 200 needles and use meths to remove the gunk stuck to them.  Mr B volunteered to do the lot (what a legend) in return for me sometimes letting him do the screwdriver bits... ha ha.

Anyway, the stage we're at currently is that the main body is out of the blue casework and I've labelled all the plates using a marker pen using the terms from the manual to help us in our quest.  Mr B has spent 3 hours cleaning needles and I've purchased 4 rolls of draft excluder to try as the replacement sponge.  Over the next few nights we'll be taking the main body to bits to get inside the needle bed where the rest of the decayed sponge bar has disintegrated.  Then we'll be exploring why the needle selector mechanism has seized.  Mr B has brought the lithium grease in from his garage as a mark of his commitment to the knitting cause.

Expect very little sewing or hand-knitting progress in the meantime, and potentially many photographs of knitting machine insides.  YaaaaAAAAAY!

Last on the list

I cast on for this little jumper the night before my planned C-section for Baby B.  Since I was scheduled last on the list, I figured I'd have lots of knitting time while waiting my turn and potentially being bumped for emergencies.  I needed something to distract me from my rumbling hungry tummy!

Anyway, I did get lots of knitting done before and after the birth, because Baby was an easy and sleepy little mite on the postnatal ward.


The yarn is WI branded (for what that's worth) and is a acrylic 4 ply and wonderfully soft.  There aren't too many acrylics I'm prepared to knit with and this is one of them.  I suspect it's a cousin of Patons Smoothie?


The pattern is "Beyond Puerperium" and my notes are here.  It ended up as a baby gift for my little niece.  Hope she likes it!

I crocheted the saturn V and I'm ambivalent about the result


For our WI's annual entry into the craft competition at the Fenland Fair, I was persuaded to crochet the Saturn V.  The pattern is pretty cool and so is the subject, but nevertheless I had a bad attitude to this project, probably because of the cheap acrylic yarn in my stash that had to be used.  My white yarn was so cheap that it showed the darker stranding inside it.  Also, crochet stitches don't align on top of each other like knitting ones do, rather they are shifted about 1/4st to the right.  Therefore, the vertical black blocks look like they are twisting clockwise around the rocket (they are).  No idea how the designer avoided this fate - vigorous blocking perhaps?

Anyway, it made it back to be stuffed wonkily into Baby B's toy bucket, to look comically bent at me whenever I see it.  Banana rocket.  At least that bit makes me smile.

Saturday, 2 January 2016

I knitted a jumper very quickly

This jumper was finished in November last year, I'm behind on my posting!


In the search for yarn that's (a) cheap (b) soft (c) wears well, I recalled the Patons Smoothie DK that I remembered doing a baby jumper in.  Turns out the only reason it didn't pill was that baby grew out of it before it had been washed too much.  This jumper in the same yarn pilled pretty much straight away.  Boo hoo.


See my ravelry notes here, the pattern is the child's placket neck pullover, changed to be knitted top-down (instead of bottom up) and with a stripe pattern and colour based on someone else's project knitted to a different sweater pattern.


I should always do a tension swatch and this jumper is why.  Gah.  At least toddler big boy likes it, and the actual knitting went quite fast (at least, when it wasn't languishing on a shelf).  It's my third time to knit this jumper pattern, I still love it.  It's so easy to knit and wear.

Saturday, 5 December 2015

Advent calendar, what was I thinking?

I was looking at the first advent calendars to hit the shops in October which were all merchandised to the max, and probably Toddler was going on for the billionth time how he'd prefer a blue Thomas the Tank Engine cake from Tesco for his birthday like last year, even though (a) He doesn't even like Thomas and he won't let me read any of the books to him and (b) The cake wasn't that nice either.  I probably thought "Argh, if I buy a Peppa chocolate calendar this year, we'll always have to have Peppa calendars until eternity."  I must have had low blood sugar and probably a blow to the head, because in my addled state I thought the solution to this was to make a fabric advent calendar.


I copied the idea from Purl Soho here, but I stitched all the felt squares onto a woven fabric because honestly, even given super quality felt, how long will their calendar last before its stretched out of shape?  Even when used by a careful adult and not a marauding toddler?  So I bought 8 colours of felt and some cream polycotton and some other weird polycotton with fused batting on the back for the main hanging.


For scale, the larger of the felt squares is 3" across.  The woven fabric for the pockets has a rolled hem along the top, and the sides are zig-zagged before being turned under.  The actual shape of the polycotton is an isoceles trapezium, but it's been stitched onto a square shape on the backing so that there is some fullness at the top of the pocket to put presents in.  So that's an intentional gape, not stretched felt, woo!

I transferred the digits for embroidery by the old skool method of pricking a paper stencil and brushing powdered chalk through the tiny holes.

The blue/brown colour scheme was suggested by Mr B.  I wanted the red-pink-green Purl Soho combination, but Mr B rightly suggested that a second exciting colour scheme which for the other calendar might be hard to think up.  The second calendar is not finished yet (baby won't notice the absence this year) so you'll have to wait to see what colours we picked for that one!  I put names on the tops to stop arguments about who has which colour calendar.


I've already sewn the pockets up for the second calendar, but they don't have embroidery numbers on yet and they're not stitched to the backing yet.  I'll admit I was cursing myself as I edge-stitched my 100th felt square and I'll probably swear some more as I embroider my 50th number.

Anyway, Toddler is enjoying opening a new pocket each day and discovering the treasures from poundland or magicked from my fabric stash.  This is going to be a rod for my own back, probably worse than Peppa and her daily dairy milk.

WHY.

Wednesday, 21 October 2015

Quick trick to make shirts smaller

I bring you one cunning trick to make adult shirts smaller for children!


Here's what to do:

1.  Find suitable 100% cotton adult shirt.  I used a men's work shirt with a 15" collar pilfered from Mr B.

2.  Wash on it's own in the washing machine on a 90degC cycle with bicarb and vinegar.  I used 3 tbsp of bicarb, which I put in the drum with the shirt, and 1 cup of spirit vinegar which I put in the soap drawer.  This should cause the shirt to shrink a little.

3.  Tumble dry on the hottest setting to make the shrinkage permanent.

4.  Repeat steps 2 and 3 again until you have reached the desired size.  I did about 5 repeats to make the shirt small enough for toddler - about a size 104cm (age 4-5).

After this, when you come to launder the shirt normally, just use non-bio soap powder and wash at 40degC with the rest of your laundry.  Magic!


Only joking.  Of course I didn't.  I used this.

Saturday, 10 October 2015

Purple trousers CAPSLOCK MOMENTS


I made my first pair of proper trousers!  I'm not counting the self-drafted trousers here and their many shorts variation friends.

I made the "Elvis" trousers from the 1/2015 issue of Ottobre magazine, whose model displays them in turquoise thusly:


I had to make these because I love me a good pair of brightly coloured trousers on a little man, and toddler likes them too.  I scored some purple twill for £2/m from St Ives bank holiday market.  Although it has an inexplicable fire-retardant backing, this has softened completely in the wash.  Nevertheless, these pants will only ever be metaphorically on fire.

A red bowl of conkers was just lying around, so I kept it in shot.  I'll admit it doesn't look as arty as I thought.

Sadly the notions cost me more than £2, even when I skipped the zippers on the back pockets.  I'm not going to count the £15 I splurged on 32 sewing machine feet from China, or the cost of the top-stitch needles, or the spotty cotton pocket facings and button from my stash.  However, I ought to count the fly zipper and the red top-stitch thread (of which I used an entire spool).  So maybe the trousers cost me £6 all in.

BOOM!  Spotty cotton!  Also, eagle-eyed viewers will note my top-stitch tension issues, even after unpicking 4 times... ARGH.

I have a thing about red and purple together.  I had SO MUCH FUN making these trousers.  Fabric that doesn't fray. lustrous red thread, new machine feet... ahhhh the good times.

The pattern is lovely, although Mr B takes issue with the style detail where the side seam twists onto the front leg.  Pah!  I love it.  They're also slim enough for Toddler B, although I am waiting on a red belt from eBay to keep them up so he can wear them now and make them last longer.  That's why the bottom of the belt-loops are not stitched down yet (just in case the belt is wider than expected).  Also, I ran out of topstitch thread, so you don't get red bar-tacks at the top and bottom of every belt loop.  I ain't buying another spool for that malarky.

I skipped the exposed metal zippers on the back pockets to save money and my furniture.

I did have a few issues with the top-stitching - my machine wouldn't get the tension right sometimes and made loops of top-stitch thread underneath the fabric, usually when sewing right on the edge of 3+ thicknesses of twill.  I think because the presser-foot had uneven pressure over the bulky seam allowances and the fabric got pulled up and down by the needle.  I managed to partly solve it by using a pad of rolled up twill beside the seam to make the foot press evenly.

Sometimes my machine skipped stitches when trying to top-stitch over e.g. 6 thicknesses of twill in a seam intersection.  Tbh who can blame it?

Ok, so now I fess up to the mistakes.  I don't know what possessed me but I didn't take into account the diagonal twill weave when I cut out.  I just folded the fabric and cut double.  I think.  Or something.  It was dark in my windowless sewing space in the evening.  Anyway, the weave is not doing what I would like across the back seam (or indeed the front).  Don't look too closely.   Also, my top-stitching could be more even, but I'm going to allow myself some leeway on that as it's my first attempt.

My top stitching is not the best, but toddler will move too fast in real life for this to cause anyone visual pain.

I'll be making these again!  IN EVERY COLOUR ST IVES WILL SELL ME.  Did you hear that, man on St Ives market stall?  I WILL BUY ALL YOUR WACKY TWO QUID TWILL.  I will look for new audacious colours of top-stitch thread.  MAD LEGS AHOY!

Note that the shirt is looking a bit small - not to worry, a new one is in the works.

In less capslock-inducing news, I have cut up one of Mr B's old work-shirts and am in the process of transforming it into a toddler sized shirt.  This is quite exciting to me (and toddler).