Showing posts with label sewing tools. Show all posts

Sunday, 2 August 2015

Exciting new pressing tools!

I have some new tools!  This is MOST exciting and is going to take my stitching to the NEXT LEVEL.  I absolutely must use CAPSLOCK because I am that excited.  Geeks ahoy.

Pressing ALL THE CURVES.

My father-in-law and husband are absolute legends and between them they have cooked me up some super pressing tools.  I bring you:

"The Clapper" and "The Super-Duper-Tailoring-Pressing-Tool" (not sure what it's supposed to be called, a "Tailor Board" perhaps?) that looks like an alien spaceship in certain orientations.

Beep beep!  Take me to your leader!

My husband got a belt sander for his birthday (a joint gift from several people and including advance pennies for Christmas 2015).  He agreed to do the shaping.  My father-in-law used to be a joiner and has a massive supply of ex-stock woods and knows all that is worth knowing about these sorts of things.  His workshop and industrial tools and extraction system* are the source of endless fascination and monologues from Toddler Button.  He very kindly selected and donated the appropriate light-coloured non-staining hardwood (Ramin, apparently).

A clapper.  Not a banger.

Father-in-law made this epic Clapper, I think it's from a bit of handrail or something.  He says it's a "Banger" where he comes from and he knows a lady who battered her ironing board out of shape with one he made before.  So it comes with a warning on that front.  My seams will be so flat, even if my ironing board isn't!

Aww it's like a mini ironing board in this orientation.

The super-duper-tool was roughly cut by my father-in-law on his industrial tools, and shaped and finished by my husband.  I can press every curve!  WOO HOO!

Also, these tools look beautiful.

*Granddad's 'NORMOUS hoover!  Really 'normous BIG!

Friday, 13 March 2015

New eyelet curtains!

A good thing to do when you're heavily pregnant is to make curtains.  All the crawling around on the floor measuring is good to get the baby in position, and there is lots of sofa time with all the hand-stitching.


I made some new eyelet curtains for my bedroom.  I have previously written about designing eyelet curtains here.  Mr Button and I spent many happy hours measuring and laying out fabric as by this time I was quite big and slow to crawl around the floor on my own (thanks, Mr B!).  Much thought was put in by both of us to minimise hand-stitching.  I did have to hand-sew all edges of the blackout interfacing in and turn up the main fabric hem, but otherwise got away with hand-stitching only the very top corners of the lining, plus the mitred corners in the main fabric.  The rest was cunningly machined by assembling the curtain in a strange order.  The result is that the front looks like a clean rectangle of fabric with no visible stitching: a boring result from a lot of effort!


Mr B hammered in the metal eyelets using the cunning hole-cutter and die set.  He has much better aim and arm strength than me.  The tools and eyelets are from Hanolex and I can't recommend them enough.  The eyelets feel and look very professional, and Mr B says the tools were easy and a lot of fun to use.  The eyelets are bearing up well under the immense weight of these lined and interlined curtains.  The interlining might be overkill on this fabric as the spots are woven and some are chenille.


I have yet to finish the curtains with the large pattern repeat that I previously winged about.  I only finished these spotty ones a few days before the baby came, but I did have time to cut out the next pair and join the drops together.  So the hard pattern-match bit is done.  Good times when you need to choose between three options: cutting perpendicular to the selvedge, or with the wonky grain line or with the off-grain pattern.  Nice.  That's what you get for £10/m, I guess.

Sunday, 8 June 2014

I have actually spent some money on fixing my sewing machine.

I am about 3 hems away from finishing a short-sleeve babydoll dress for meeeeeee in brown interlock knit.  I have now spent several hours fixing my sewing machine and feet before I can finish it and it's driving me bananas.  I still haven't finished my dress.  On the plus side, I'm winning.

Read more of the gripping tale below:

Tuesday, 6 May 2014

I'm going to bias bind EVERYTHING.

Sewists* of the internet!  For years I have been baffled by your impeccably bias-bound seams.  For a time, I thought it was just the camera angle, but then you started to post close-ups.  Close-ups!  I ask you!  I was despairing in my soddy and wonky binding.  I began to avoid binding.  The thought of a Hong Kong seam made me shiver.

No more!  Your secret is out!  Mwa ha ha.  My husband has bought me perfect bias binding for my birthday (18 again of course, but I won't say which base that's written in).  Now I finish binding with ease.  Take THAT, Sorbetto top!

* I hate the term sewist; I'd say "sew-er".  However, it turns out it's indistinguishable from the the infrastructure that conveys sewage when written.

Sunday, 6 April 2014

Servicing your own sewing machine = quite easy actually.

I was going to wait until post-quilt-apocolypse before servicing Able Mabel, but sadly the thread tensioner ceased to tension this afternoon so we brought the date forward.

Turns out it's actually super easy, but in all the excitement I failed to take any pictures.  It only took a few hours.  The thread tensioner was just gummed up with fluff, and quite a few joints inside were running completely dry, so Mabel was feeling a little stiff and arthritic after 12 years of hard stitching.  All she needed was a dismantle and good clean and oil.

In case you also want to join the fun and save yourself £70 excl vat and parts, here are my top tips:

Useful equipment

  • Screwdriver set (I needed big and small phillips head, and wide and narrow flat head)
  • Blu-tack and pen and paper, for drawing diagrams of casework and sticking on the screws to remember what goes where
  • Kitchen roll and lots of Q-tips/earbuds and toothbrush for cleaning
  • Torch; ours has a magnetic pokey-thing that comes out of it which is pretty handy for locating screws
  • Oil (my machine came with some)
  • Suitable grease for plastic to plastic lubrication (I left these parts alone as they looked well greased anyway)


I just took the plastic parts of the bodywork off, as my Janome 423S has some metal casework which doesn't need to be removed.  Then I cleaned well, removed nasty black oil, and re-oiled all of the metal moving joints, including those underneath the machine.  I also cleaned the thread tensioner and bobbin race and feed dogs.  Now she purrs like a contented kitten.

I found small flat-head screwdrivers useful to ease plastic lugs carefully, and I used Q-tips like nobodies business.

If you also have a Janome 423S, here's my recommended disassembly order:
  1. Remove the casing on the end above the needle.  (The screw is hidden behind a plastic cover which can be eased off with a screwdriver.)
  2. Remove the plastic cover on the opposite (plug) side of the machine and remove that screw too.  You won't be able to take the side off yet, so don't bother with that: you just need the wiggle room.
  3. Remove the plastic cover underneath the machine.  There are LOADS of screws here.  One of these (near the front right of the machine) you won't be able to remove through the hole: that's because it's to hold the purple front-plate on.  You need to loosen this screw anyway in order to get enough movement in the front plate to work the bottom cover off.  Janome have probably had to drill the hole in the casework after molding when they found you can't remove the bottom without loosening the front and side.  Whoops!  Once you've removed all the screws, you should be able to take the bottom off by hinging it towards the belt/motor side of the machine: you'll need to wiggle the front and side covers to get enough play to be able to hinge the plate off without snapping the lugs.
  4. Remove the top cover of the machine: there are screws under the handle and also one holding a bobbin-winding "stop" on.  There's also one on the side at the needle-end.  There's a plastic lug at the right-hand side, so like the bottom piece, the top needs to be carefully removed by hinging it toward the motor/plug side.
  5. Remove the side cover over the motor/plug.  I didn't bother to remove the purple front-plate, as I could get the access I needed without it.
I like having a totally mechanical machine - it's highly likely I'll be able to fix it myself and keep it running for years and years.  I didn't need to take the moving parts to bits on this occasion, and the motor was fine too.  A really quick service this time around!  If you're thinking of buying yourself a mid-range machine, you can't go far wrong with this model and it's still for sale new.  At a glance, it appears to have fewer stitch options for your ££, but that's because it's predominantly metal-bodied rather than plastic.  Mine is 12 years old next month, and this is the first time I've had to touch it.  It's had reasonable use in that time, too.

That's it, my lovelies!  Service your machines now and save yourself more money for fabric!

Thursday, 5 September 2013

My favourite sewing tool

Did you realise it's national sewing month over in the USA?  I wonder if that translates to the UK: I rather think it ought to!

Anyway, in honour of such, I'm going to nominate my favourite sewing tool:

Other brands of iron are available... :-)

I know it looks ridiculous, but it's true.  I just can't sew without my iron, board and press-cloth.  I have this set up right next to my machine all the time, preferably with minimum moving distance between the two.

Advantage:  Lazy lady doesn't have to move more than 2ft to get to the iron.
Disadvantage:  Numerous close shaves relating to knocking the hot iron off and scorching my feet, or worse: the carpet.

In my opinion, it ought not to be called "sewing", but rather "ironing", as I spend more time pressing my seams than I do sewing them.  I feel it's absolutely key to getting a professional finish.  I know some find it a pain to always iron, and while I sympathise a little (household ironing is indeed tiresome), I find sewing ironing completely different.  It gives you some thinking space before the next step and time to appreciate your work so far.  Plus, subsequent seams always seem to work better if the first lot have been pressed.

In my forays into quilting and tailoring, I read that one ought not to sweep the iron from side-to-side when ironing, but rather "press" downwards, then lift the iron before moving it.  This stops woven fabric distorting, and means your patchwork or garment pattern pieces do not stretch oddly.  Since making that change, I can personally vouch for what a huge difference this makes!  Suddenly my carefully cut pieces all match!

As the photo suggests, I have a cheapo iron with a stainless steel sole plate.  I find it quite adequate for my needs, so long as it can do a good steam shot for tailoring.  You can get those fancy-pants constant steam ones with a separate water tank and generator; while I found one good for thick wool coat fabrics and quilting cottons, it was a disaster when trying to press delicate silks.  So on balance I would opt for the £20 one over the £200 version any day.

A final note on sole-plates.  You can get nasty whiffy sole-plate cleaner that looks like a glue-stick which you can rub on your hot stainless-steel soled iron.  It makes all the fusible interfacing glue that was stuck to it go away and your house will smell horrid for hours.  But at least you have a sparkly new looking iron, and a new-found love for your press-cloth in the future.  I've no idea what you do to clean a ceramic one.

A tangential note:  My iron photo looks like it wouldn't be out of place in Barbie's house- argh!  If only the pink iron hadn't been the best value.  Also, have you noticed that a size "M" cleaning glove fits an average woman's hand, while a size "M" latex glove for the lab fits an average man's hand?  Women: know your limits!  ;-)

Friday, 17 May 2013

Sewing tools: what's hot and what's not?

I thought it might be worth a quick analysis of what's worth buying if you're new to sewing, and what's not worth the cash.  I hope this will be useful!

First up, the tools which I use the most.  I'd say they're all essentials to start out, except the last item (overlocker), which is a "nice-to-have", but only for dressmaking.

Sewing scissors:

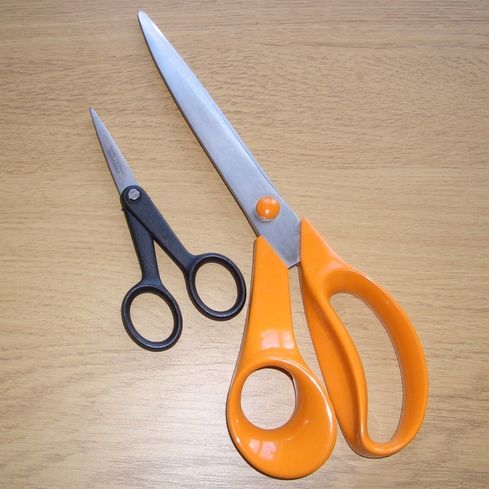
I think it's worth having two pairs: one large pair of fabric shears for cutting large distances and one small pair of embroidery scissors for snipping small things or threads.  Never use these for cutting paper - it will blunt them and leave you with sad fabric snipping.  Boo hoo.


Tape measure:

The kind of one that rolls up into a container when you press a button may look cool, but I find the container annoying when it comes to laying the tape out flat on my fabric.  I prefer a flat non-stretch tape that has both inches and centimetres.  (I draft patterns metrically, but prefer to sew in imperial.)


Pins:

I think the ones with a coloured glass or plastic head are easier to spot in your fabric.  Glass is probably better because you won't melt it with the iron, but I'm always too cheap and get the plastic ones.  My supply constantly dwindles because they end up accidentally in the bin attached to fabric scraps, or sucked up by the hoover.  I don't bother with a pin-cushion, I just stick them in a little pot.  Pins, Mother!


Seam ripper:

Even when you're super careful, you'll probably end up ripping out at least one seam per garment, so this is another must-have.  I find they get a little blunt with constant use, so I keep two: one for ripping out seams, and one newer one just for slashing button-holes.  There's nothing worse than using a blunt one for your button hole and accidentally tearing through the bar-tack and half the button-stand.  Almost-finished-shirt = wrecked.  :-(


Iron + board + press cloth:

This is almost the most essential tool.  You MUST work next to your ironing-station and press constantly or your results won't look very good.  Really, it shouldn't be called "sewing", but rather "ironing", as more time is spent pressing than at the sewing machine.
A boring normal iron is great, as long as it does steam.  I think a stainless steel sole-plate is best (not ceramic), but only because I know you can use nasty soleplate-cleaner on the steel ones, which is always handy to remove the interfacing glue from it when you make an error.
A press-cloth is handy to keep fusible-interfacing glue off the iron soleplate to start with.  I just hemmed a bit of cream or white cotton I had hanging around for this job.  Don't use coloured cotton: the colour will transfer!  Argh!


Hand needles:

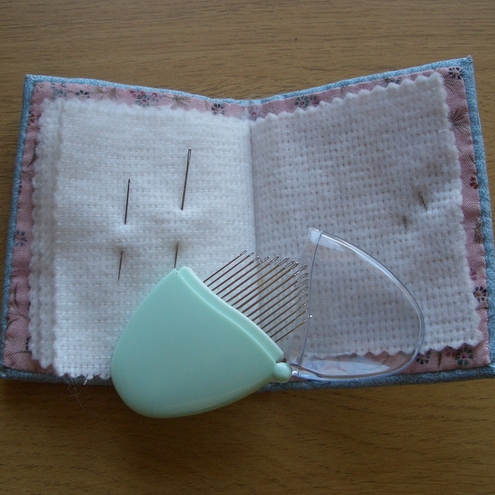
A collection of sharp fine needles for sewing in threads, tacking and blind-hemming.  I've also found a selection of leather-work needles useful for mending jobs, but those aren't essential for regular sewing.


Sewing machine:

You can get lots of fancy-pants models, but I just have a basic Janome.  I only really use 3 stitches: straight, zig-zag and buttonhole.  A one-step buttonhole feature is nice, but probably 4-step would also be fine.  You might want a blind-hem stitch, but I prefer to hem by hand.  Some machines offer an overlock-style stitch to finish your raw edges if you don't have an overlocker, but I always found I preferred to use zig-zag for this.  Finally, you might want to consider a top-loading lower bobbin as this is easier to switch quickly for quilting.  Don't be tempted by the cute mini-machines on offer unless you're short for space or it's as a second machine.  I think you'll quickly get cross when your work won't fit under the arm: you won't have a hope for quilts.  Finally, make sure you can buy a good selection of feet for your machine.  Don't let the expense of a sewing machine put you off sewing: a super-cheapo one with just straight and zig-zag is really all you'll ever need for most things, as long as you can get the feet for it that I mention next.


Machine Feet:

Most machines come with a regular foot which does well for most work.  Additional feet which I use most often are: one-step buttonhole foot, concealed zipper foot, regular zipper foot.

L to R: buttonhole foot, regular foot, zipper foot, concealed zipper foot.

Overlocker (non-essential):

I managed for years without an overlocker, just zig-zagging my raw edges.  These machines cut and enclose the edges in one action using three or four threads to stitch over the raw edge.  If you find yourself making lots of clothes then this might be a worthwhile investment, but check out the second-hand market as many are returned barely-used by people who can't get on with threading them.  You don't really need one for home-decoration sewing and not for quilting either.  I really only use it for adult clothing.


Coming next:
The nice-to-haves and the blitzy do-withoutables!  :-)