It feels to me like there's been a bit of a blog silence here. Mr Button is recovering from an operation and Baby Button is spreading food around the place, which means not much else is being accomplished. Hey ho.
The Blooper Shirt v1.0 which I finished drafting some time ago appears quite large when I printed it out. In an unexpectedly long baby nap, I decided to test this theory by measuring stuff.
The little mini-mode shirt in 6-9 month size seems to have the same dimensions as a lovely 9-12 month M&S shirt he has unworn in his drawer: whoops. I guess he could have been wearing that! These are only slightly smaller than the town shirt in 9-12 month size I made for him last month. All of these are about 2cm smaller in length and width than my 12 month sized Blooper pattern. Some calculations from my pattern drafting size charts reveal that had I drafted a 6 month size for the blooper shirt then it would match the aforementioned commercial shirts.
It's not news that clothes from different shops are different sizes, but I'm still irked at the discrepancy. The mini-mode shirt is similar in size to all the other 6-9 month clothes that Baby Button has, and he's between 6-9 and 9-12 ranges at the moment. I'm surprised that my pattern-cutting textbook would have him in a 6 month size: that means the book drafts come up large compared to most commercial ranges. Also I have to draft a new shirt to try it on my model. Bummer.
On another note, I realise that this blog already at 1/4 the number of page views (in total) of my most popular post at the Splendid Fishpaste Auditorium. Amusingly this post is about a really dull Fortran gotcha. Dearest internet: you have strange tastes.

Monday, 29 April 2013

Sunday, 28 April 2013
Button cushion


This cushion was inspired by one I saw here.
The front is ever so simple to make. I cut the cream fabric out as a 21.5" sided square. I used thick curtain lining, I think: it's certainly considerably heavier than quilting cotton. Then I folded it corner-to-corner and finger-pressed along the diagonals; this helps to find the centre of the cushion. Don't iron these creases like I did, or you may never get them completely out again!
Cut 11.5" square piece of contrast fabric. I used pink raw silk (which might just be polyester masquerading as fancy silk). Place a 11" square piece of card in the centre of the fabric on the wrong side, and fold the edges around the card. This helps you get the 1/4 turn neat. See this tutorial (from Hyena in Petticoats) on how to deal with the corners in this method. (The tutorial is unrelated, but there is a step in there on folding around a 9" square in the manner I am suggesting.) You now have a neat 11" square.
Place your front-fabric right-side upwards on a flat surface, then place the contrast square right-side upwards on top. Use those diagonal creases to help align the 11" contrast square in the centre of your cushion front. Pin in place, then neatly top-stitch through all layers around the contrast square to attach it to the front. For this, I'd stitch around close to the edge in a matching thread using a short stitch-length. Then press the whole lot: it's your last chance to press the contrast fabric.
 |
| Securing the contrast fabric |
Next comes the button placement. I went for 100 buttons arranged in a 10x10 grid, spaced by 1". Buttons can be bought cheaply online by weight, so if you don't mind pot-luck then it's the way to go! Sometimes it looks like you get left-overs from clothing manufacturers. I used a combination of these, and buttons taken from my husband's shirts (not the ones still in his wardrobe, I hasten to add!). My average button diameter was 10mm.
I used my 11" card template and drew the 1" grid on it. (Note that the first and last rows/columns of buttons start 1/2" from the edge.) Next I transferred the markings to my cushion front. There are probably much better ways to do this, but I aligned the template on the cushion front then stuck pins through the template where each button would go. I then made a dot where the pin struck the fabric below using a dressmaker's pencil. The world of quilting might have better ideas: perhaps you can puncture the card template at each button position, align with the cushion front, then shake chalk-powder over the template such that it marks the fabric where the holes are.
Once the holes are marked, I tediously stitched each button on by machine. I tried to alternate the way I stitched the four-hole buttons from "x" to "+" across the cushion. To machine stitch the button, I set my machine to zig-zag with a stitch length of 0. I removed the very base of my presser-foot, leaving just the foot shank. I then lowered the shank so that it held the button down onto the fabric, and carefully stitched between two holes about 7 times. Next, I lifted the needle and presser-foot-shank, rotated the fabric, lowered the shank and stitched through the other two holes. After removing the work from the machine, I pulled all the threads through to the back of the work and tied them off before trimming them short.
 |
| Varying the stitch pattern between "+" and "x". |
 |
| Piping: oops! You can see the braid texture through my flimsy fabric choice! |
 |
| Button back |
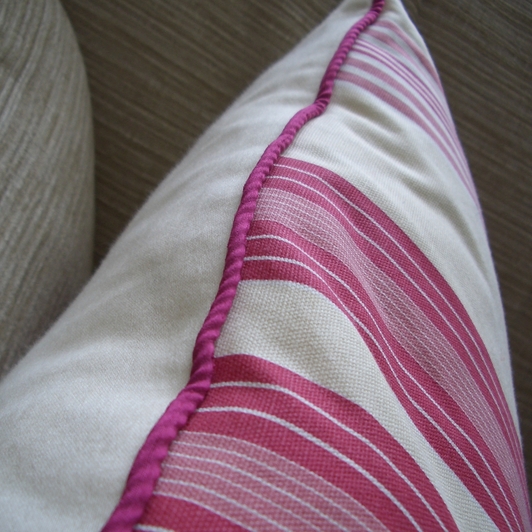
The back of the cushion is a button-back (see here) made with upholstery weight stripy fabric. I also used some piping I made myself using the same pink silk-stuff as the front. I like piping, even though my sewing machine is very bad at attaching it - I need to do a post about my work-around for that.
This post is part of a series:

Monday, 22 April 2013
My favourite dressmaking book

I guess it's not massively helpful to review an out-of-print book, but you can sometimes get it used on Amazon for £0.01, and I've seen it several times in charity shops, so you can still buy a copy if you look out long enough! Right now there are several on eBay for 99p.
Here goes: my favourite ever dressmaking book is "The Encyclopedia of Advanced Dressmaking", edited by Annie Woolridge. It's not really a teach-you-the-basics one, but once you've made a few simple dresses you'll be past that stage anyway. As soon as you want to try even a simple skirt or shirt there are already techniques in here that you'll find you need. For example, different hemming methods and when to use them, types of interfacing and when to use them, waistbands, pleats, and this is all before page 25! Pleasingly, most of the fashions in here have come round again already (inverted contrast pleats, wasn't that 2007-ish?)
There's also a fair bit on pattern alterations, both for fit and style (e.g. sleeve types) which is pleasing, and quite a lot of pages are devoted to grading patterns into different sizes. That's pretty useful if you want to have a stab at making patterns yourself, or the pattern you got for free/cheap wasn't quite in the right size.
The tailoring techniques section looks to have a lot of the basics, but it's worth investing in a book on that whole subject if you're going there and want to do it properly.
There's also loads on how to work with difficult fabrics: sheers, leather, fur, velvet, sequinned etc. What I like about this book's approach is that it doesn't waste time telling you how it's easy, it just tells you how to do it right. There are no corner-cutting suggestions, just dictums on the right way to cut a skirt from tartan fabric so that the checks don't just match, but fall in the right places on the shirt front. That's the level of nit-picky detail I love it for.
What the book does not do is cover every technique you'll need. I haven't found piping or invisible zippers in here (although I may have missed them). It's not really an encyclopedia in that sense.
Unlike so many books today that have you learn techniques through projects, or have "easy" projects at the end of each chapter which turn out mostly to be ugly bags, this book saves the patterns to the last half of the book where they're printed in graph form for you to enlarge yourself. At a second glance they do seem to include some of the techniques in the book (fur, leather, sheers, silks and lace), but that doesn't appear to have been the motivation for choosing them. Rather, they're a well rounded selection with something for everyone, and are awesome 70s style. There is a nightie, several coats and loads of dresses, a peplum camisole (back in fashion right now) with matching skirt, some slightly comical menswear, a dated wedding dress and some maternity wear. For the kiddies there is a sun-dress, adorable duffel coats and a really cute sou'wester set. Okay, some patterns look terribly dated, but quite a few are classics.
The book is published by Marshall Cavendish Books Limited in 1978. It's worth buying just for the fabulous fashion illustrations!

Thursday, 18 April 2013
Finally finished that shirt pattern!
This has taken me an absolute age (gah!) because I had to stop to re-stock the shop, do a bunch of tedious mending and do the parish newsletter. Plus, it's really hard to accurately draw with your left hand while feeding baby. Enough excuses! It's done now, and all that remains is to separate the pages for A4 printing and try it out.
I think this pattern will be the first of many iterations, as this one has a separate collar stand but no back yoke, and I really want to do a yoke eventually. Plus I want to put in more cute menswear details, and then do a girly version. Start pestering me now if your child wants to be my girly-shirt tester! (It'll be a 12 month size.)
I thought it would be fun to name my shirt iterations after sails, so I bring you... "The Blooper Shirt". Clearly I had to start somewhere, and the blooper is clearly the most ridiculous and awesome of all the sails. See here and here. The alternative name for this sail is just as silly.
I think this pattern will be the first of many iterations, as this one has a separate collar stand but no back yoke, and I really want to do a yoke eventually. Plus I want to put in more cute menswear details, and then do a girly version. Start pestering me now if your child wants to be my girly-shirt tester! (It'll be a 12 month size.)
I thought it would be fun to name my shirt iterations after sails, so I bring you... "The Blooper Shirt". Clearly I had to start somewhere, and the blooper is clearly the most ridiculous and awesome of all the sails. See here and here. The alternative name for this sail is just as silly.
 |
| Blooper blooper blooper. |
Tuesday, 16 April 2013
Pleated/tucked cushion

My inspiration was this "pintuck pillow" at the Long Thread. I hesitate to call mine pintucks because they are quite wide really. Hooray for maths, which helps you to make the cushion right first time, in any size!
 |
| Tucks are 1/4" and spaced by G as shown. |
First, choose your finished cushion size, X. Mine was 20.5" each side. Then choose how many 1/4" tucks you want, Y. I went for 16 tucks on my cushion. For Y tucks, you'll have Y gaps between rows of stitching, and we want to work out how big these gaps will be by calculating G = X/Y. For me, G = 20.5"/16 = 1 9/32", or 1 1/4", close enough. When we make the tucks, we'll centre them on the cushion, so that there's a gap of G/2 at each side of the cushion before the tucks start.
How big should the fabric be?
Each 1/4" tuck uses 1/2" of fabric, and we also need to add 1/2" all round for the seam allowance when we cut the cushion back. So approximately I'll need a piece X + Y*1/2" + 1" wide by X + 1" high. For me this is 20.5" + 16*1/2" + 1" = 29.5" wide, by 20.5" + 1" = 21.5" high. If you can, it's better to cut out a piece a few inches larger than this all round. This is because it's easy for your tucks to pull light fabric off-square or for the piece to end smaller than you intended. Just a 1mm error on each seam makes over 1/2" error by the time you have tucked the whole 16! So do all the tucks in a bigger piece and cut it back to size at the end.
Making the tucks
You'll be making tucks parallel to the short edge of your fabric. Each tuck is made by ironing the fabric wrong-sides together, then stitching a scant 1/4" from the fold. This is quilter-speak for slightly smaller than 1/4", so that by the time the fabric is opened out and pressed then you have used 1/4" exactly. This is because the stitching line never presses perfectly open (the fabric is not infinitely thin!). After each tuck, I like to open the fabric out and press the fold toward one side. I think it's satisfying to watch it come together, plus I love to iron. But not laundry, that would be boring. :-)
The first crease should be at least 1/2" + G/2 + 1/4" from one end. This is the seam allowance, plus half-a-gap, plus the 1/4" tuck size. I ironed my first crease more than 1/2" + (1.25"/2) + 1/4" = 1 3/8" from one end. Actually, I probably did it 2" from the end because I'd given myself the wiggle-room discussed above. Then, with the piece still folded wrong-sides together, I stitched the 1/4" seam as discussed.
It's then just a matter of pressing and stitching and pressing again for each tuck. The next tuck should be made by pressing the fold in at a distance of G + 1/4" from the last stitching line, which for me was 1.5". Then once you've stitched and pressed you'll find the stitching lines are separated by G.
A word on picking threads, as the stitch line is visible in this project. Always take your fabric with you and look at a length of the thread unwound from the spool and lying over the fabric. You're unlikely to get a good match without doing this, as the thread can look very different on the spool! If in doubt, go a shade darker than the fabric, not lighter, as this will blend better.
Making up the cushion
Cut your front back to the intended size, for me this was 21.5" square (for a 20.5" cushion with 1/2" seam allowance all round). I find a quilters' square, self-healing mat and rotary cutter are good for this job. Make sure your tucks are central on the cushion front as you do this!
I added a button back to my cushion. Details on how to do this (and fabric amounts) are here.

You can just stitch the front directly to the back, but I prefer the look of piping. I made my own covered piping using strips of fabric and piping cord. One is supposed to cut bias-strips at 45 degrees to the grain, as the fabric flexes and bends better, and I'd imagine wears better too. However, I am cheap and ignored this as it leaves you with either (a) two very large annoying triangles of fabric left and an empty wallet, or (b) nearly used-up fabric, but piping with many seams in it, or else yards and yards of piping. Anyway, more on piping in the aforementioned post on button backs.
This post is part of a series:
Friday, 12 April 2013
New items in shop!
After a bit of delay procuring supplies, the shop is now re-stocked with vest extenders, including two adorable new prints: whale and birdhouse! Check them out!


Thursday, 11 April 2013
Tree cushion

The design for this cushion front is entirely due to the very talented Allison at Cluck Cluck Sew. Check out her amazing quilts! She posted this tutorial here: clicky. I have copied her tree design exactly as it's awesome.

A couple of changes I made:
- I ironed small scraps of double-sided fusible to slightly larger scraps of fabric in a bid to save on both materials and minimize glue accidentally getting on my iron sole-plate.
- The cream fabric behind the tree is a heavier weight fabric from the curtains and upholstery department, rather than a thin quilting cotton. I thought this would hold the tree flatter and get less distorted by the layers of fabric and stitches.

- The cushion back is made from a sandwich of quilting cotton and the same cream fabric as the front. This makes it more robust (see my tutorial here).
- The cushion is large, about 20.5" each side.
- I went for machine satin-stitching (close zig-zags) around the applique to stop the fabric fraying with repeated wear.

This tutorial is part of a series:
Subscribe to:
Posts (Atom)