Showing posts with label shirt. Show all posts

Wednesday, 21 October 2015

Quick trick to make shirts smaller

I bring you one cunning trick to make adult shirts smaller for children!


Here's what to do:

1.  Find suitable 100% cotton adult shirt.  I used a men's work shirt with a 15" collar pilfered from Mr B.

2.  Wash on it's own in the washing machine on a 90degC cycle with bicarb and vinegar.  I used 3 tbsp of bicarb, which I put in the drum with the shirt, and 1 cup of spirit vinegar which I put in the soap drawer.  This should cause the shirt to shrink a little.

3.  Tumble dry on the hottest setting to make the shrinkage permanent.

4.  Repeat steps 2 and 3 again until you have reached the desired size.  I did about 5 repeats to make the shirt small enough for toddler - about a size 104cm (age 4-5).

After this, when you come to launder the shirt normally, just use non-bio soap powder and wash at 40degC with the rest of your laundry.  Magic!


Only joking.  Of course I didn't.  I used this.

Sunday, 10 May 2015

I totally made another Ottobre shirt!

I have previously made a shirt from the 1/2015 issue of Ottobre magazine, see here.  I made another for my own toddler.

"I want to see [myself] doing cheesing!" - Toddler

The fabric is a nasty cheap polycotton from St Ives bank-holiday market.  I was so disillusioned with it's cheapness that I couldn't be bothered to pattern-match.  I also ended up using thread that was too light in colour because I lost my matching spool somewhere on my messy sewing table.  It turned up just as I finished the shirt, so it got used for the buttonholes only.  Oh well...

I got in a big pickle with the plackets last time and ended up drafting my own.  Time and reflection are a wonderful thing, and I totally understand them now!  I nailed it!  The key phrases that I wish were in the instructions are:  narrow right placket to be applied like an edge binding, and left placket to be applied to the front a bit like an appliqué strip.  And yes, you do need a seam allowance on the opening edge.


I also nailed the hem this time around.  I clipped the curves before overlocking the edge, then turned it under once and top-stitched.  That works!

I re-used six super red buttons from one of my mother-in-law's shirts.  Even omitting the collar buttons, I still didn't have enough matching buttons.  I used two of the six matching buttons on the cuffs and the remaining four down the front.  The lowest button on the front matches in style and size, but is blue instead (turns out my mother-in-law had two identical shirts in different colours).  Finally, the buttons on the collar-stand and pocket are the same red but completely different styles picked from my button jar.  You totally don't see the collar-stand button that much anyway.  Toddler is fascinated with the non-matching blue button: I caught him showing it to his father and then his brother.

I made the 98cm size again (approx 3 years old size), and it fits my tall slim 2 1/2 year old like a glove, which means it won't last long.  (He's just gone into UK age 3-4 clothes.)  I will not make this size for him again: time to trace out the next size up.

The fit of the shirt is amazing, absolutely perfect for my boys.  The outlay on the magazine is totally worth it just for this pattern.  I am already planning shirts number 3, 4 and 5!  Next I am going to make the trousers in the same image.  I scored some purple twill for £2/m from the St Ives market, it's going to be EPIC.


Monday, 16 March 2015

Ottobre 1/2015 "Elvis" shirt

You can tell when I've got a small baby feeding at all hours of the day and night, because my blog posting frequency suddenly goes up!  I've already read the entire internet, so I've resorted to adding my own content... ;-)

I finally caved in and bought myself my first issue of Ottobre magazine as a treat, a few days before baby Button II arrived.  I was so excited to unwrap it on the postnatal ward (although obvs not as excited as having baby himself).  So many lovely designs to make for the boys!

The main reason to select this issue was the shirt (design 20):

Shirt from Ottobre 1/2015, page preview pilfered from their site.

The sizes start at toddler and go up to about age 12, as I recall, so I am hoping this pattern will see me through the next 10 years at least!  Shirts are what I really like to make for Toddler Button, although I like the cool trousers in the image too, so he might be getting a pair of those.  I just wanted to spare myself drafting shirt patterns constantly and focus on sewing them.

Anyway, the shirt has cuffs and a yoke, which I'd always wanted to add to my own patterns.  Sadly, turns out that the yoke is stylistic only, and not double thickness in the original instructions (as it would be on normal menswear), but there is no reason why I could not cut it to be so.  I'm also planning some yoke style changes to mix things up in the future, and maybe a re-draft of the cuff plackets,  These are all speedy and minor drafting changes though, and should be fun.

I was quite nervous to cut into the fabric because I had some real concerns about the piece designs I'd found on the pattern sheets.  Firstly, the left placket looked narrower than I was expecting, especially compared to the tiny schematic of it they print with the instructions.  Secondly, I wasn't sure where to add seam allowances.  They state "The patterns include hem allowances, placket extensions and placket facings.  When cutting out the garment pieces, add seam allowances of approx 1cm ... to each edge of the pattern."  Indeed, the placket patterns had marked seam allowances on them, but the front opening of the shirt didn't have allowances marked, so I wasn't sure if this was included under the placket rule or not.

The shirt front has two cutting lines marked "left" and "right" for the different sides.  The right button placket is supposed to be narrow for style reasons, and the left placket has a more normal width.  In order to have the collar stand fit the neckline correctly, once the plackets are inserted then the front pieces should finish along the line marked "left".  Since I was super confused about how to get this to work, I ended up re-drafting a new pattern for a placket 2 x 44mm in width, adding the 1cm seam allowance at each edge. I cut two new plackets to my re-drafted design, cut both fronts down to the "right" line, then applied my plackets with a 1cm seam allowance.  Both plackets are now identical, loosing a style feature, but at least the shirt has gone together.  Reading back the instructions with hindsight, I can see how the left placket was supposed to work (and yes, you do need to add a seam allowance down the front), but I'm still confused about the right one.  Perhaps all will be clear next time.
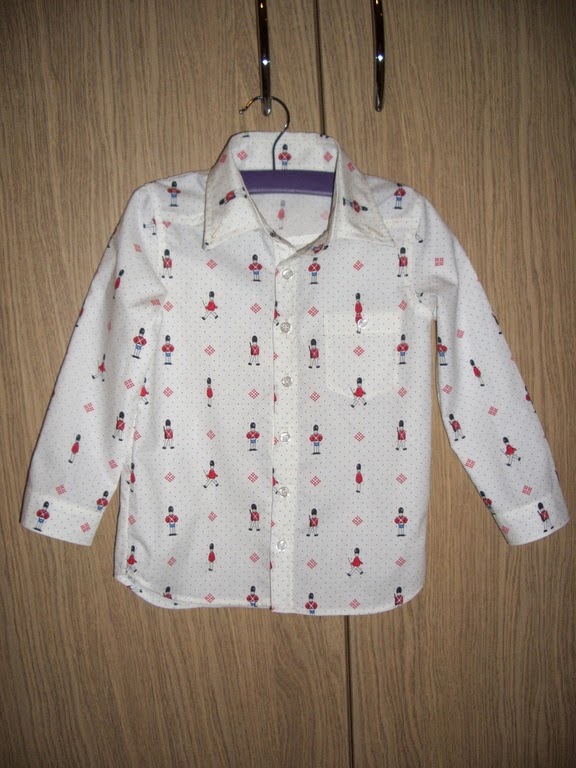
You don't get good garment photos on this blog until I get spare time during the day with two hands!

I made the 98cm size in our old friend the Laura Ashley soldier fabric.  It's probably the last shirt I'll get out of it (boo hoo).  I tried super hard to match patterns on this shirt, but there are still a few things I'd do differently with the pattern placement, especially now that I know how the front plackets work.

In other news, the cuff plackets were easier to figure out than I expected (I couldn't find their suggested method in a brief flick through this book so I did a trial run on scrap fabric).  Also, the sleeves went in without fuss, and I overlocked and topstitched the armhole seam after clipping it, so it lay flat.  Not sure why I never thought to clip the seam allowances at the armhole before (clearly I was being dense), so I'll chalk another one up to the learning experience.  I'm still a bit rubbish at getting the hem done neatly and easily around the side curves.  I wanted to do a rolled hem, but there was no way the thick plackets and seam allowances were going to feed through my rolled hem foot so I did a double turned hem instead.

Check out that pattern matching!

I'm really pleased with this pattern overall.  I love the little details like the collar and pocket buttons, and I'm hoping the slim fit will look really smart on.  I can't wait to make more of them!  I massively underestimated the time it takes to sew it with two small children under 3.  I'd quite forgotten how much work goes into a shirt with all the seam grading and top-stitching.  However, the complexity is exactly why I love to make them; a t-shirt just wouldn't be so satisfying.

The shirt is for Toddler Button's little friend.  It's my payment for the amazing Pocoyo birthday cake his kind and talented mother made for Toddler's birthday in December.  I hope it fits him!

In other news, I am really disappointed with the range of shirting and printed dressmaking cottons available online.  I want to make more funky and bold shirts for Toddler, but all the cotton poplin and lawn is turgid floral patterns that even I wouldn't wear.  I'm going to have to resort to quilting cottons (argh) to make cool shirts.  Toddler likes to wear shirts like Daddy, and he'd dress like a crayola box if I let him.  (Favourite outfit: grass-green trousers, blue and purple t-shirt and bright yellow tank-top.  Granny let him wear it once, because she is nice.  Mummy is a big meany.)

Friday, 24 October 2014

Spooky shirt

It's Hallowe'en soon, and the onslaught of compulsory dressing-up parties for toddlers.  It seems like in the US, any costume goes, however in old blighty we stick to the traditional witches, pumpkins, skeletons and perhaps a zombie or vampire or two.  Sadly it's much cheaper to buy a shiny scratchy polyester outfit from the supermarket than it is to buy the fabric and make your own wonky creation.  That makes me a bit sad, mostly because I can't justify 1m of orange cotton on economy grounds.


Note the sticker from a pumpkin he has applied to his tummy.  Also, this is his "smile" face (eyes are shut).

Nevertheless, Toddler Button gets his own special shirt for the occasion, because it turns out you can just about squeeze my age 2-3 shirt pattern from a piece of 75cm wide 1m cotton for £2.20 off ebay (free postage!).  Here, squeeze means really squeeze: I had to piece the under-collar from two scraps of fabric to make this baby work.

I thought spools of black and white thread never ran out in this house, but it turns out they do run out if you don't keep buying them.  Boo hoo.  Therefore, because I was light on time and thread, we have minimal top-stitching and some of the buttonholes might be stitched with grey/brown thread on the reverse.  Also I was short of one orange button, so we have a different button friend lurking on the collar stand.

The bits all over my floor are pegs.  Thanks, toddler.


I'm sorry that my child is not going as a "thing", but he will look cool (I hope) with his spiders and trick-or-treating skeletons.  I wanted to get shiny sliver and black spiderweb fabric, but it's probably as well it was twice the price because it would have been a bit Liberace.

Model wears his new shirt over a long-sleeve t-shirt.  Did you really think I'd have enough fabric for long sleeves?!  He's also pretty pleased about the buttons, because he can now say "Orange!".

Next year, maybe I should make him this outfit?!  Ha ha!

Wednesday, 8 October 2014

Toddlermatician shirt

When I saw this fabric a year ago on a WI outing to Bee Crafty I had to have it.  Isn't this just the most awesome badass maths fabric you have EVER seen?


I love the combination of chalk-board effect with areas of mad colour.  The most awesome part about it is that the maths is correct.  It even contains reference to Napier's rules, which I even had to look up to see what they were as I've never had occasion to use them.  (Mr Button the person with the real actual Mathematics degree guessed they were to do with logarithms: they're not.)

I've only spotted one error in the maths so far (a missing factor of 2.l.b):

This will annoy me for ever.
I decided that Toddler Button needed a shirt in this epic fabric.  He likes shirts a lot now, because Daddy wears shirts.  Daddy doesn't have a shirt as loud as this one:


With every snip and stitch, this fabric seemed more awesome to me, but also more loud.  This shirt is quite... mad?  Somehow it didn't make my eyes dance when it was on the bolt, but is definitely individual as a shirt.

Can you see the patch pocket in this image?  Me neither.
The pattern is my self-drafted size 2-3 years pattern, see this previous shirt with the skewered soldiers.  Toddler has just started to wear this size in my shirts (they seem a bit bigger than commercial 2-3 stuff), so there is plenty of growing room left.  I didn't have enough patience or fabric to draft a back yoke for this shirt, so we'll have to wait until I have a longer length of fabric and less inclination to just get going fast (as a break from knitting).

Yellow buttons.
Obviously there was only one choice for the buttons.  If I intend this shirt to become a favourite of Toddler Button, it has to be his obsession colour: yellow.  He's not worn the shirt yet, but I'll be sure to let you know if it has the honour of being selected by his Lordship from his drawer in the morning.  He did want to try it on before I'd had chance to slit open the buttonholes, so I have hope.

How could I let this fabric languish in my drawer for a whole year?!  WHAT WAS I THINKING?

Sunday, 9 March 2014

Little Soldier Shirt... again!

I mentioned last post that I had an 18-24 month pattern that I was happy with.  I made a little soldier shirt in Laura Ashley fabric using the pattern.  Sadly, Toddler Button continues to grow at an alarming rate.  Something must be done!

I graded my pattern bigger into a size 2-3 years, which is now the size that TButton prefers on his top half.  Then I drafted a new shirt!  This is most exciting:


I made several thrilling (to me) pattern alterations.  I was having some issues with the collar points turning up, so I made two changes in this area.  Firstly, I fused my interfacing to the upper collar, instead of the lower one.  Secondly, I drafted a different upper-collar pattern, allowing an extra 2mm on the outside edges for the turn of cloth.  I then had to ease it up as I constructed it.  It works a treat!


I used a different method for drafting the collar stand, which I think I prefer.  I also changed the hem to a shaped line, but it still needs a few tweaks.


I changed the aspect ratio of the pocket which is much more pleasing.  Please ignore that my pattern almost matches, but not quite.  I need to mark my pocket placement on the pattern itself, so that I can nail the pattern matching at cutting out time.  Instead of my current method of: nah, wing it.

Unfortunately, when I was cutting my front pieces from a double-thickness of fabric, the under-layer must have twisted slightly because my pattern does not match across the centre front.  It matches perfectly at the sides, though.  Bummer!  Don't mention it to TButton if you see him wearing it: I know he'll look embarrassed... ;-)

Skewer'd!  Oof.

Finally, I found these pleasingly red buttons in my jar.  Every one is slightly different, but you'd have to look pretty closely to be able to tell.  A bonus effect is that some soldiers look sadly injured by the placement of the buttons.  Ooops!

***

In other news, I drafted a t-shirt pattern but it turns out that all my old t-shirts are too small to be able to cut up for TButton.  I'll have to order him some actual new fabric to test it out.  I'm also nearing the end of my custard-yellow knitting, and I designed some fabric for a competition regarding whales.  Look out for more posts soon!

Saturday, 22 February 2014

Little town shirt again!

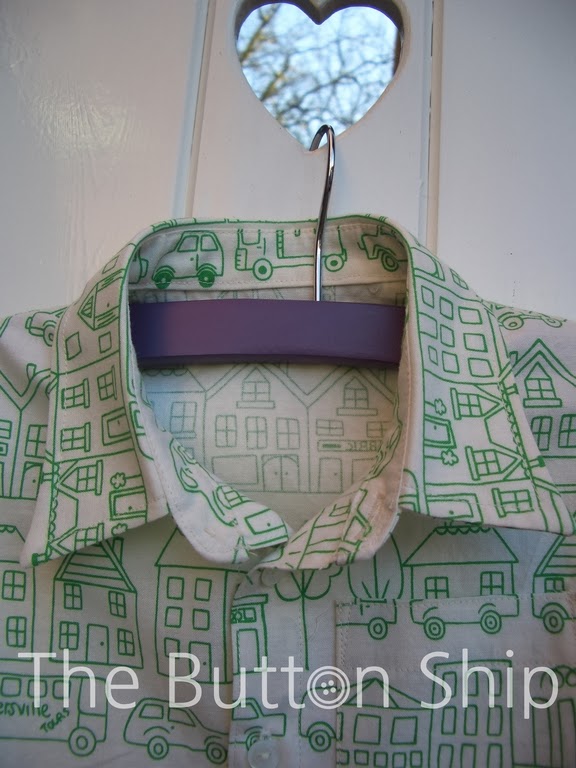
Once upon a time, I made a little shirt with a town on it.  I was delighted with many aspects of the pattern (which was made by someone else), but not so delighted with others.  In particular, it happened that when baby Button grew into it, he did so by stretching lengthways, making it more of a crop-top.  (Which I just mistyped as "crap-top", coincidence?  I think not.)  I'm sure the patten would be fine on more normally proportioned children though.  He was wearing size 12 months at age 6 months, so probably this was part of the problem.

Not so long ago, I made another shirt with soldiers on it.  This was a pattern I drafted myself and I was pretty chuffed with it.  I lowered the sleeve cap a little more after making that shirt, so now I have a 18-24month pattern that I'm happy with.

The next chapter of the story is here:


I used up the rest of my town fabric (I had half-a-metre) to make another little shirt from my own pattern.

Unfortunate house on wheels.

Behold!  It has a pocket!  However, there was so little fabric that I couldn't fussy-cut the pocket and as a result it looks like the house is on wheels.  I can't get too sad about this though: I thought I'd have to make the inside of the collar stand and the under-collar from plain cream fabric, but I did at least have enough to make everything match.  Just.


I had to wait almost 2 whole weeks for a day dry and bright enough to photograph this shirt.  I seem to gravitate towards photographs on my garden gate with the cute heart cut-outs.  Big thank-yous to my father-in-law who made the gate and acquiesced to cut the "silly hearts" into his handiwork.  I know you read this blog sometimes: now you have your own mention!  :-)

This shirt is a birthday gift for a very cute little man who is 1 year old this weekend.  Happy birthday, little one! x

Tuesday, 4 February 2014

Little Solider Shirt

I can't remember if I wrote about this (I think I didn't), but last year I got fed up with Winifred Aldrich's "Metric pattern cutting for children's wear and baby wear".  Or rather, I didn't understand what I was doing and the blocks were too boxy.  A nice person over at the sewing forum suggested I get Natalie Bray's books, which I did.  Nice and cheap and second-hand.  See here and here.  I read the first one cover-to-cover, and in the second one I read the children's wear chapter.

This is my first attempt at a shirt from her blocks.  I'm pretty pleased!  The bodice block for aged 2-3 actually fits my (pretty giant) 14 month-old like a glove.

Behold: Toddler Button in his fancy new threads:


The fabric is a cute Laura Ashley print of soldiers with a background of blue pin-dots and red diamonds.  It was a kind gift from a family friend.  (Thank you, Sue!)  Sadly, since I made the shirt in a windowless room (no jokes) and mostly during the dark evenings, I failed to notice the fabric was light cream, rather than the white I had supposed when picking out my thread.  Whoops, although I suspect I'll be the only one scrutinising the top-stitching enough to notice.  I modified the armcye in my pattern a bit after making this, as it was still an effort to get the sleeve caps to set flat like in his other casual shirts.

TButton wore his shirt to Ikea (this seems like it's becoming a tradition: I don't always go there, honest).  It's a relief to return from Ikea and still like the hand-sewn clothes we went in!  Note he is smiling in the above photo: that's because it's taken before the flat-pack-hell-hole, hence also the newly-pressed-new-shirt look he's sporting.

Are you wondering how I got him to pose like a menswear model while holding a little teddy by his paw all cute-like?  Do you want to know my secret?  The answer is... fluke.  All the rest look blurry and manic like this:


Monday, 19 August 2013

Baby's posh threads and other news

It's been rather quiet out here in this blog on the post front.  This is because the Button Shipyard has been super busy!  One set of baby's grandparents visited for a week, and now I have 10 days to swab the decks, cook and complete village-based activities before the other set of grandparents come for another week.  Fortunately, baby is delighted with all grandparents and has a wonderful time.  Mummy is so boring, apparently.

I'm going to break my self-imposed ban on people-pictures and post a picture of the wedding outfit for your delight.  The Blooper Shirt, Moonraker Waistcoat and Gennaker Trousers look much better with a small person in them:

Ta da!

Apologies for the bright blue rug and mismatching socks.  I totally ran out of time to make tiny black shoes, and didn't have the presence of mind to sit him on grass and expose the tiny baby toes instead.

We all had a super time, and huge congratulations to the bride and groom who looked stunning and very happy.

I keep saying I'll make the shirt and trouser pattern available, but I need to fix things with the shirt first.  In the progress of that, I got distracted by this forum, which is a UK-based sewing forum.  It's amazing and has very talented and generous people on it, who recommended me to get some new pattern drafting textbooks.  I'm super excited for them to arrive and I'll tell you all about them!

In other wooly news:

My Stegosaurus got featured as pattern of the day at Quartered Heart Crochet!  It's a lovely pretty website, take a look!  A big thank you to Amy and her three-year-old who has excellent taste.  ;-)  I hope she'll like her dinosaur.

Chameleon is doing my nut.  I think I said that about Stegosaurus too at this stage.  I'm on my 5th pattern, and 5th crochet attempt.  I'm working from the tail up and I've reached about row 120; I think I'm almost done with the tail... ARGH!  I think I need a less complicated idea for the pattern after this one.

The third bit of wooly news is that I got IDed to buy knitting needles yesterday.  Seriously, you have to look over 25 to buy a 3mm set of circular needles in Dunhelm Mill.  HA HA HA HA HA.  I wonder what you must do to convince them if you happened to be under 25 but legitimately wanting to knit?!

Finally, I save the best wooly news until last:
My super-talented knitty friend has a new blog!  You can read about her adventures with hand-dying yarn and pick up some serious fibre knowledge while you're at it.  Hooray!  I can't wait to see the results.

I'm on the Christmas sewing and knitting from next week.  The great thing about this is that I'm starting in reasonable time, but the downside is that I can't post any of the resulting images or free patterns until after December 25th!  Bah!

Tuesday, 23 July 2013

A pretty blooper shirt!

I meant to post this aaaages ago (bad me), but somehow it didn't occur.  My lovely pattern tester made this super Blooper shirt for her son:

Note the epic pattern matching across the front!

Now for some close-ups, so you can see the french seams that she's made on the insides...

Neat stitchery!

mmmm... french seams...
I know I keep saying I'll get that pattern out.  I just need to make the changes that she highlighted before I release to the world!

Super-blooper, I like that... ha ha ha.

Thursday, 18 July 2013

Long sleeve shirt finished


I finally got around to putting buttons on the shirt!  I've not tried it on baby yet, so no idea how that's going to go.  Look at that fabric!  Just look at it!  I've ironed it, but you just can't tell.  So disappointing.

The shirt has no back yoke, and no cuffs (as the groom as already observed: "where will he put his cufflinks?") as I'm too lazy and tight on fabric.  I don't think it's necessary as the waistcoat is fussy enough.  Talking of which:


I need to make the neck on this pattern wider, and the sleeves longer on the short-sleeved version.  Undoubtedly there will be sleeve changes on the long sleeve one too.

I don't know what's up with the colour balance on my camera, everything looks blue.  Sadly for you, this is a sewing blog not a photography exhibition, so I'm not mucking about to correct it.  :-P

Wednesday, 3 July 2013

Dullard no-pictures post.

Hello m'dears.

I hope you've all got your wool out for Mr Stegosaurus!  ;-)  It was quite a push to get that pattern out, so I hope you'll forgive the silence on the posting front.  Unfortunately baby prefers other toys which are more jangly, because I was so wound up about whether the stegosaurus looked like a beige poo that I forgot to put a bell in him.  Anyways, the pattern is now on Ravelry here (so you can queue it, ha ha), but of course it just links to this blog for the pattern.  I'm planning the next crochet pattern already!  (Shhhh...)

In other news, my lovely pattern tester (hello there!) has finished her version of the Blooper shirt and she's made a super job of it!  This means that when I get time for some last tweaks, I can release the pattern to the world.  Look out, dudes.

On the sewing front, I've almost finished the white long-sleeve shirt to go with the waistcoat.  I'm still disappointed in the fabric, but it looks better as a shirt.  I've not had chance to add buttons or button-holes yet, or to try sewing up the trousers.  I'm going to trial downstairs sewing to boost productivity, but probably not this week as I've got secret crochet to complete!

Saturday, 22 June 2013

Snippety snip

I made a baby trousers pattern!  This could be good, because I struggle to get normal trousers on over the cloth nappies.  However, after finishing the draft I realise:
  • The pattern example in my helpful pattern-drafting book allows for nappies.  I also measured to allow for nappies.  Could he now have room for 2x nappies?!
  • The trousers will fit baby NOW!  This does not guarantee a fit at the wedding in two months' time.
Silly me.  Nevertheless, since I got this far I decided to cut some fabric for them anyway.  I found some soft black needlecord in my fabric chest so I'm going to test out the "Gennaker trousers" with that.  They're cut out and ready to sew, but I've never made trousers with a fly before, so I'll probably have my "Great British Sewing Bee" moment.

My ambition is to have elastic in casing around the back, but a smooth waistband at the front and an opening fly so that I can get the pesky things over the nappy.  The fly is intended to close with a button at the top and potentially some concealed poppers the rest of the way down.  We'll see how that goes.

I also cut out some white cotton for the long-sleeved shirt to go with the waistcoat I made.  I got the cotton for £4/yard from the bank holiday market in St Ives, but in retrospect it wasn't such a great pick.  I totally should have gone for the polycotton.  This fabric is a little too thick, not a very fine or tight weave at all, and basically looks like a crumpled bed-sheet even after I pressed it with ooodles of steam.  It didn't look so bad on the bolt, but that was before I washed the finishing out.  Added to that, I got a yard cut diagonally from the bolt.  Disaster!  The moral is that you get what you pay for, and I should inspect the fabric quality more carefully next time.  I'll report back on the quality of the gabardine and printed polycotton from the same stall when I get to them.  Probably I've just been unlucky with this buy.

Before anyone seems impressed, I'm totally bottling out of cuffs on this shirt.  It's for a baby!  I'm just going to turn-under or use bias binding.  However, I am featuring a pocket on the trousers for him to store his chewed up toast in.

The crochet stegosaurus is doing my head in.

Tuesday, 14 May 2013

Blooper shirt finished!


Woo hoo!  It's complete!  All the pieces went together easily (even those dratted sleeves... I hate sleeves) so now you can place your bets on how long baby wears it for before he re-decorates the front.

The rest of the inside seams are serged.


Eventually I'm going to actually have to buy shirt buttons, unless Mr B wants to donate any more of his shirts to the cause.  I've got my eye on the pink, red and purple stripy one with the stain on the front...

Oooh plackets.

I didn't bother to interface the collar since baby shirts are so tiny and it's liable to be chewed anyhow.

I'm pretty pleased with how easy the construction was with a 3/8" seam allowance.  Adult commercial patterns always have 5/8", and this makes sleeve insertion much more difficult in my opinion.  Plus, I saved myself fabric with the smaller allowance and still had enough for easy overlocking.  A shirt in 1/2 meter: win!  (Although this did mean I had bits of selvedge in my seam allowances.)

Pattern available soon, I expect!

Time to go and dress someone in this...

Edit: It's still quite roomy on him!  This is despite having drafted the 6 month size, and him otherwise wearing commercial 9-12month clothes.  Amazingly he might actually still be wearing it at 6 months old!

Friday, 10 May 2013

Sewing excitement: another shirt

I'm so excited, I finally managed to cut out a shirt for my little cabin-boy, based on my own Blooper pattern!  It's in this amazing coastal houses design by Makower, and it will be his first piece of red clothing:


Pleasingly, I got it out of 1/2 meter by some pretty stingy cutting, and so far all my seams line up.  The sleeves and collar will be the big test, though, and those are the bits I haven't sewn up yet.

I haven't decided yet whether to offer this pattern for sale yet, or just the finished shirts.  Just in case I'm taking instructional photographs as I go, and I have a volunteer who wants to make it up first (hello there!).

This clearly isn't a very useful blog post, but I had to share my sewing geekery excitement at breaking free of the commercial pattern racket.  With the exception of Burda magazine, they're getting ridiculously expensive.  Ye olde patterns had a coat, jacket, dress and skirt in one envelope; now you just get the skirt.  Bah.

I need to sew quickly: baby grows too fast!

Thursday, 18 April 2013

Finally finished that shirt pattern!

This has taken me an absolute age (gah!) because I had to stop to re-stock the shop, do a bunch of tedious mending and do the parish newsletter.  Plus, it's really hard to accurately draw with your left hand while feeding baby. Enough excuses!  It's done now, and all that remains is to separate the pages for A4 printing and try it out.

I think this pattern will be the first of many iterations, as this one has a separate collar stand but no back yoke, and I really want to do a yoke eventually.  Plus I want to put in more cute menswear details, and then do a girly version.  Start pestering me now if your child wants to be my girly-shirt tester!  (It'll be a 12 month size.)

I thought it would be fun to name my shirt iterations after sails, so I bring you... "The Blooper Shirt".  Clearly I had to start somewhere, and the blooper is clearly the most ridiculous and awesome of all the sails.  See here and here.  The alternative name for this sail is just as silly.

Blooper blooper blooper.

Wednesday, 20 March 2013

Town shirt

While the cabin-boy was napping, I finished his shirt!  I used this free pattern, and made a size 12 months.  You don't get to see it on the model because it's still a bit big for him (hoorah), and I've made enough too-small clothes to provide a small wardrobe for other people's babies.


I love the fabric, and hoorah for it not being blue (like everything else).

Pleasing things about this pattern include its free-ness, and that you can get the shirt out of 1/2m (even when being a tiny bit fussy about the placement of the pieces in the design).  Also, it has a back yoke which is a feature I really like.


Sadly I can't offer shirts from this pattern in my shop (its not for commercial use), but it's been really useful to help me make some design decisions for my own pattern drafting.

I like the yoke, but I like it done "properly" as a double thickness.  Even though babies don't really need the extra shaping and stability, I think the extra layer makes the shirt look more finished on the inside.  However, the down-sides would be extra fabric and extra complexity.

I've learned that trying to make my life easier by sewing the sleeve seams "as one" with the side seams does not work on this pattern, as the serged seam allowance causes puckers under the arms in a shirt this small.  Maybe I'm nit-picking here, but I should have done it as the pattern directions dictate.

I was initially sceptical about the seam binding used at the shirt hem (why not just turn under twice?), but on reflection I really like the look.  That is, if I can be bothered with the faff again.

Finally, the pattern has the collar and collar stand as a single piece.  An interesting simplification, but I think I prefer ye traditional version.  But again ++complexity and fabric.

I guess I'll have to give these trade-offs some further thought.


Interested in adult shirt-making?  What isn't in "Shirtmaking" by David Page Coffin isn't worth knowing.